During this year’s WWDC, Apple introduced the latest version of its operating systems, with iPadOS 18 being one of the main highlights. As part of our series of tips and tutorials, find out below how to install the public beta of this new system on your iPad.
Please follow us on Twitter and Facebook
With the public launch of iPadOS 18 set for next September, anticipation for the new version is high. In June, Apple showcased several new features that will be added to its tablet system.
These features include new customization options for the home screen and control center, biometric protection for apps with sensitive content like photos or notes, improved writing capabilities with the Apple Pencil, and a new calculator app that can interpret handwritten mathematical functions.
But should you take the risk of installing a beta version?
Should I Install the Beta on My iPad?
Despite the new features, it is important to assess the situation before installing the beta version of iPadOS 18. Even though it is a public beta, it is still a system that is not ready for the final launch, which means problems and bugs are likely to occur.
Therefore, unless you have a second iPad for testing or your iPad is not crucial for your daily activities like studying, working, or entertainment, we do not recommend installing the beta version.
Don’t risk an essential tool in your daily life.
Compatibility
If you have a second iPad to test the new version of the system or are set on installing this beta on your main device, you need to check if it is compatible with the new iPadOS. Here is the list of compatible models:
- iPad Pro (M4)
- iPad Pro 12.9-inch (3rd generation and later)
- iPad Pro 11″ (1st generation and later)
- iPad Air (M2)
- iPad Air (3rd generation and later)
- iPad (7th generation and later)
- iPad mini (5th generation and later)
How To Install The iPadOS 18 Public Beta On Your iPad
Before you start installing, remember to back up your iPad’s data. This will let you downgrade to a stable version of the system if the beta version is no longer usable. You can back up your data via iCloud or a computer.
Without further ado, follow these installation instructions:
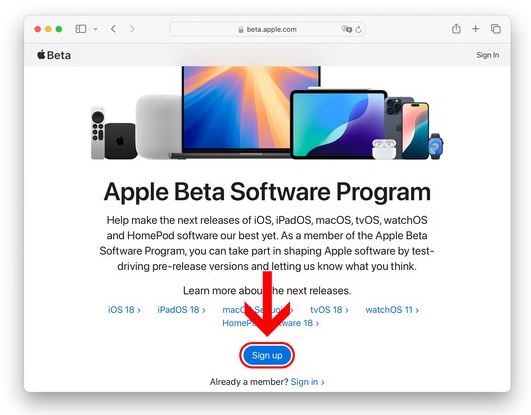
- In a web browser, go to the Apple Beta Software Program website and click the “Sign Up” button. If you already have an existing test account, click “Sign In.”
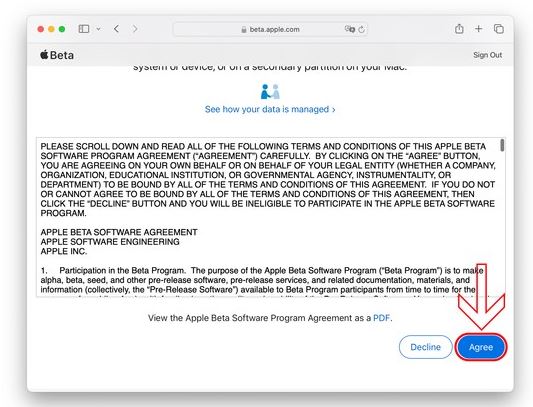
- Enter your Apple account details and agree to the terms of service to proceed.
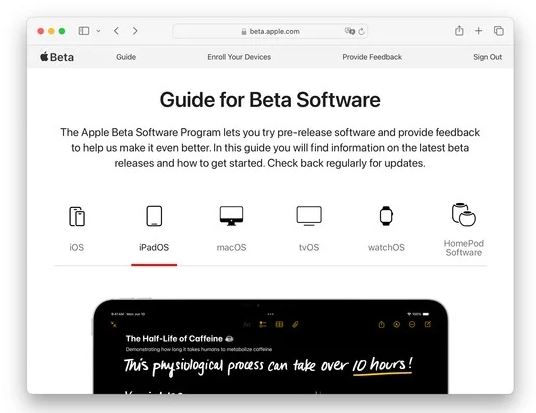
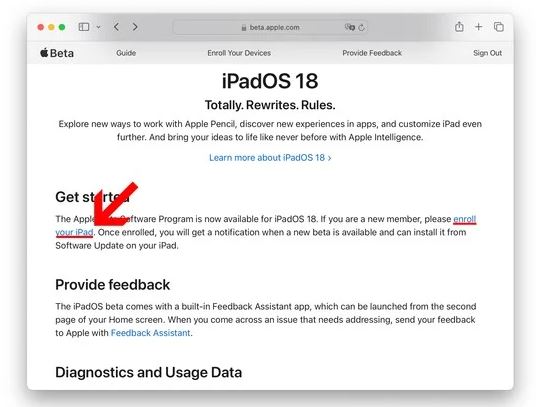
- The main screen will display tabs for beta versions of each device. Click on iPadOS, and in the “Get Started” section, click on “Enroll Your iPad.”
- Back up your iPad via iCloud or a computer.
- With your iPad in hand, go to the “Settings” menu > “General” > “Software Update,” and tap on “Beta Updates.” In the new menu, select the beta version and return to the previous menu.
- Wait for the system to search for the latest beta version, click “Update Now,” and follow the on-screen instructions to complete the beta installation.
Now, keep an eye out for new beta versions through the same software updates menu. The system will notify you whenever a new version is available for download.
Even after the stable release, you will continue to receive alerts for new beta versions. To switch to receiving only stable releases after the general release, turn off the “Beta Updates” option.
If the beta version you installed has too many bugs and you want to revert to the previous version of iPadOS, refer to Apple’s guide to restore your system from a backup. If you cannot restore, opt out of receiving beta versions and follow this other guide to restore your iPad to factory settings.
Read Also: iPadOS Now Subject to Strict EU Competition Rules
